How to Assess Your Course with UDOIT


What is UDOIT and what will it check?

The Universal Design Online Content Inspection Tool, or UDOIT (pronounced, “You Do It”) enables faculty to identify accessibility issues in their Canvas courses. From within Canvas, UDOIT will scan a course, generate a report, and provide resources on how to address common accessibility issues.

UDOIT will identify “errors” and provide “suggestions” in the following areas of your course:

  • Announcements
  • Assignments
  • Discussions
  • Pages
  • Syllabus
  • Module URLs

It will check for the appropriate use of the following:

  • Use of headings in page structure
  • Alternative text for images
  • Table headers
  • Color contrast
  • Video captions

However, UDOIT is not able to check:

  • external documents
  • some videos/audio files for captioning/transcripts
  • Hyperlinks in pages or assignments

How do I run a UDOIT scan?

  1. Click on the UDOIT link under the course navigation menu, which will take you to the Welcome page, under the “Scan Course” tab.
  2. At the bottom of the page is a big, green Run Scanner button. Click on the button to run the scan.The scan make take anywhere from a few seconds to a few minutes to complete. Do not navigate away from the page while the scan is in progress. The results will display below the Scan button.

How do I work with the UDOIT results?

Each report will be archived and accessible by clicking on the Reports tab. Note that you cannot fix errors using UDOIT from an archived report. If you navigate away from the results page, the report will not be active anymore and you will need to run a new scan in order to make corrections using the UDOIT interface. Be careful about using the back button to the browser, as you will exit the results and will need to run a new scan if you want to fix the issues in UDOIT.

Don’t be overwhelmed by the number of errors or suggestions. Certain items will generate a lot of errors and suggestions (such as using the color red).

Click on the + next to a resource (page, assignment, discussion, etc.) to reveal information about the error or suggestion. Clicking on the resource itself will open a new browser window on the page with the error.

Below are common results from UDOIT tests to help you understand what the results mean, and how best to proceed. Results explained here are divided into Errors and Suggestions. Generally, Errors demand your attention, and Suggestions are less critical. Some important items can be in Suggestions. Click on the bars below to reveal more about each topic.

Common UDOIT Errors

Image Alternative Text Should Not Be File Name

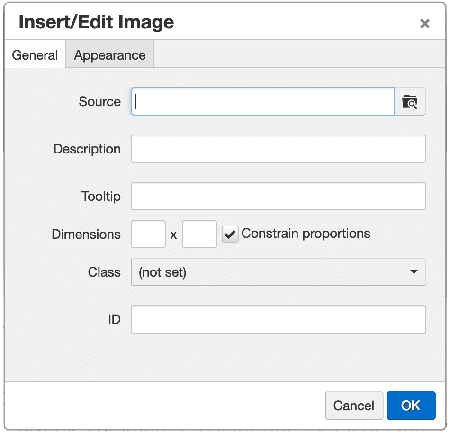
When placing an image on a page, assignment, discussion, etc., Canvas will add alternative text to the image by using the file name. This text will not be sufficient. Even if you have named your image with good text, the appendage of .jpg or .png, etc. will not be the best. Click on the “View the source of this issue” button to see the image. Click on the U FIX IT button, enter alternative text into the provided “New alt text” field. You will have a limit of 100 characters, including spaces.

Headings Should Contain Text

When spacing down from heading text, sometimes Canvas will create another heading tag, but there is no text in the tag. This is what is called an “empty header” and is an accessibility error. These are difficult for an instructor to notice without a checking tool. Click on the green U FIX IT button and check on the check box next to “Delete this header completely”, UDOIT will remove the empty tag.

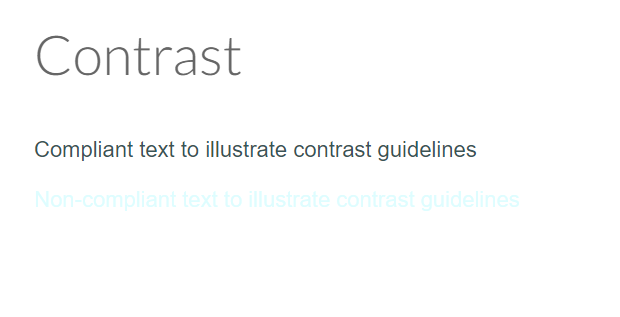
Insufficient Text Color Contrast

UDOIT will show a preview of the colored text, the source code, and furnish a set of color options (these will be very limited, one type of red, one yellow, three blues, one purple, etc.). If you click on one of the colors, the html code will be set for you.

Evaluate the text called out to make sure the colored text is really text. A colored bar may be interpreted as the text next to it, and so the correction offered won’t be a solution if in fact there is an issue.

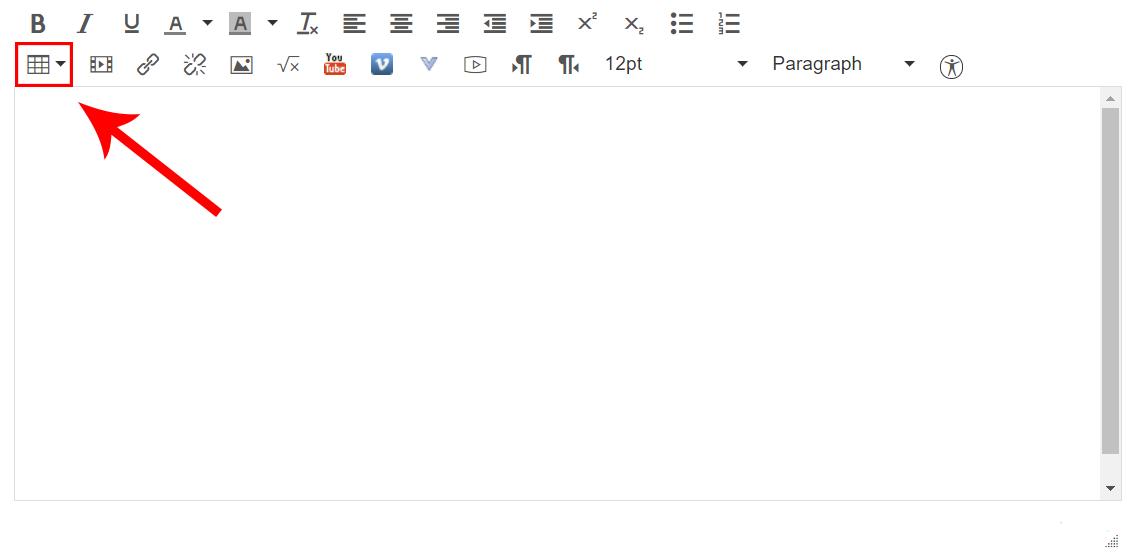
No Table Headers Found

UDOIT will recognize when tables are used, whether in a traditional data table, or if tables are used for layout purposes. Tables used to affect the layout of the page (as opposed to organization of data) do not need any fixing. This includes using a table to place two images next to each other, or some text to the side of an image. Generally, this is not a best practice use of tables for accessibility. Avoid them if you can, but if you find you do need to use tables for layout, ignore the “No table headers found” accessibility error.

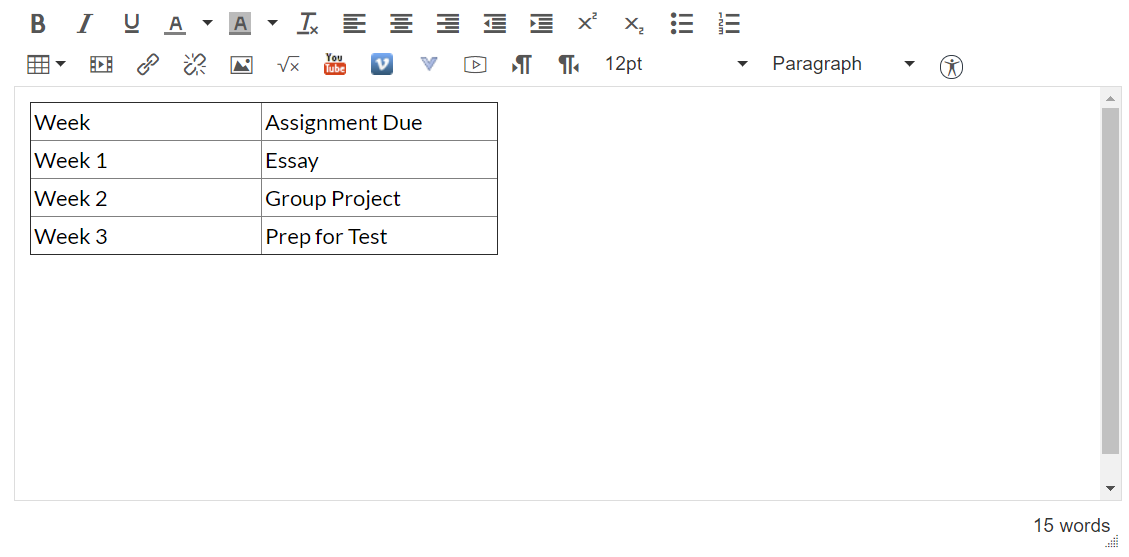
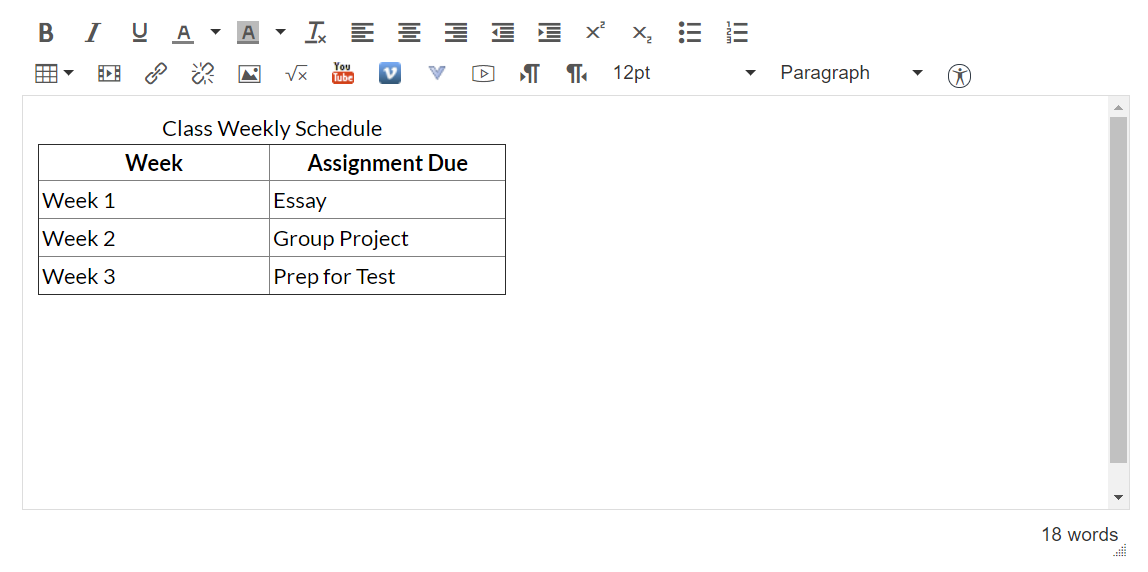
EXAMPLE OF DATA TABLE

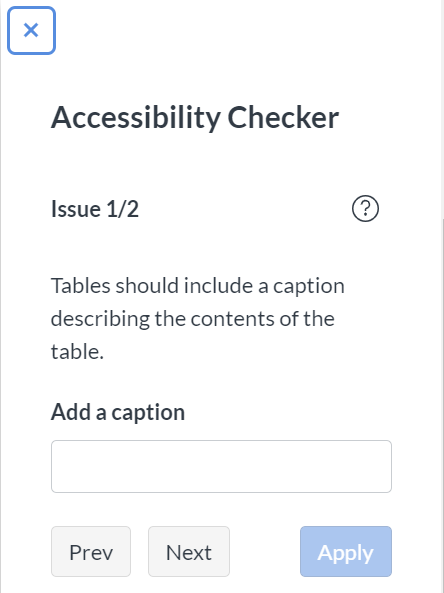
For a data table, use UDOIT’s U FIX IT button to add code designating header cells for the table. You will need to choose whether your header cells are column headers or row headers. Your choices will be “the first row”, “the first column” or “both the first row and column” as shown in the screen shot, below.

Links Should Contain Text

This error can be caused when a link is created, but the link was not created fully or was deleted partially The hyperlink text is missing. The instructor may not see anything. There is errant code in the HTML, but there is no visible indication of this partially-made link. Click on the “Delete this link completely instead” check box and hit the Submit button to remove the code.

Synchronized Captions Should be Provided for Prerecorded Web-Based Videos

This error may come up even if the video is captioned. In limited testing, videos with automatic captions from YouTube (no punctuation or quality assurance) were flagged as well as videos with no captions at all. Videos with good synchronous captions usually were not flagged.

There is not a fix provided for this issue. Follow up with the Instructional Accessibility Specialist to be sure all videos required for the students are captioned. You can use the “View the source of this issue” link to reveal the video and the code. To get an indication of where in your course materials you have embedded the video, click on the heading to the error in the report. A new browser window will open up displaying the page.

Common UDOIT Suggestions

Image Elements Should Have an “ALT” Attribute – For Decorative Image

If you have checked off the “decorative image” box in the Canvas image dialogue box, UDOIT will bring it to your attention, so that you can evaluate if the image is in fact decorative. If the image is decorative, you can ignore this suggestion.

Image Should Have an “ALT” Attribute

Canvas will automatically add alternative text to an image by using the file name, but when copying and pasting in elements from other applications, you may see an image that does not have any alternative text whatsoever. Though this is a suggestion, it should be marked as an error. Be sure to fix it by clicking on the U FIX IT button. Enter alternative text into the provided “New alt text” field. You will have a limit of 100 characters, including spaces.

Link Needs To Be Descriptive

Hyperlink text should always be descriptive. URLs are awkward for screen reader users. Click on the UFIXIT button and type a description of page or site linked to in the new link text field.

Avoid Using Styles for Documents Structure

This is an annoying suggestion because you will get one of these for each time you use bold or italic text. Do consider that when you use bold or italics, don’t use them instead of heading tags where you should.

Add Headings

If you have not added headings to your page, you will get this suggestion. If you have limited text, you can ignore this suggestion.

Color Alone for Emphasis

When adding color to text for emphasis, consider that the text will not be emphasized for the visually disabled. Adding Bold or Italics to the text will alert the visually disabled of the emphasis.

This page was adapted from the UDOIT User Guide on the Instructure Blog

Microsoft Guide to Accessibility in Word/O365

Microsoft has prepared a useful guide with a guide to creating accessible documents using MS Word. This is a great page to use as a reference, as it has step-by-step instructions on how to create Word documents that will work with assistive technologies. Please click the following button to visit the guide.

Topics covered include:

  • Best Practices in Word
  • Adding Alternative Text to Images/Visuals
  • Making hyperlinks, text, and tables accessible
  • Using built-in heading styles
  • Using accessible text color

Accessibility and Universal/Inclusive Design

It is estimated that around one-fifth of the world’s population has a disability. By following the WCAG guidelines, we can not only better serve faculty, staff, students and community members with disabilities, but also increase usability for all users. This is often referred to as Inclusive Design or Universal Design.

By making our websites, Canvas courses and documents accessible we can make campus resources usable for any person.

We often think of Accessibility in terms of screen reader users, but all of the following populations should be considered while creating new content:

Vision Impairments

  • Blindness
  • Low Vision
  • Color Blindness

Hearing Issues

  • Deaf
  • Hard of Hearing

Cognitive Issues

  • Learning Disabilities
  • Inability to remember or focus

Technical Issues

  • Slow connection
  • Screen size
  • Unsupported Technology

Changing Abilities

  • Effects of Aging
  • Broken Bones

By following some of the guides on this site, you can begin to structure your content accessibly, whether it be in Canvas or OmniUpdate, and best serve your campus population.

Images in OmniUpdate

Images by default are inaccessible to those who cannot see them due to poor vision or blindness.

In general, images containing text should be avoided in favor of text alternatives to convey the same meaning. This is a legal requirement of the WCAG 2.0/2.1 specification.

Images Need Descriptions

Add Image pane in OmniUpdate showing Source and Description fields
  • We need to provide descriptions for anything that contains informative content.
  • Photos can be appropriate descripted using the Description field (pictured in preceeding photo), which contains a succinct description of the content of the image.
  • Keep in mind that we are just trying to convey the content of the image to the user and are not trying to overwhelm them with a wordy description.

Decorative Images

If for some reason an image must be added to the page and it does not require a description, if used for look or feel for example rather than contributing to the meaning of the page, we can give leave the Description field empty, which will tell screen readers to ignore it.

NOTE: Use caution with an empty description field. If there are words on the image, or the image links to another page, the Description field must not be empty.

Using OmniUpdate’s Accessibility Checker

Once you feel that your page is ready for the world to see, there is one more step before you Publish the page to ensure that it is accessible to all audiences.

  1. Press the Publish Button (seen in the following image).
    Publish Button
  2. The Publish Dialog box will pop up giving you a few options before publishing.
    Publish Dialog showing the Accessibility Checker tool location in OmniUpdate

    In order to best prepare your site, I suggested running both the Broken Link Checker (labeled as “Links”) and fixing any issues it finds, as well as the Accessibility Checker.

  3. Review the initial results of the scan that you ran.
    Results of OmniUpdate Accessibility Checker

    The problems are broken down into 3 categories: known problems, likely problems, and potential problems

If you need help fixing any of the issues that you find, please contact Bryan Besnyi.

Using Tables in Canvas

Tables should be used to show tabular data to students, but in some cases are used to create layouts. By using tables to visually style content, we may be doing a disservice to users of assistive technology because the intent of the table is unclear.

In Canvas, creating accessible tables is very simple.

Table tool in Canvas' rich text editor

You can use the Rich Content Editor to build out the table in the correct dimensions and get all the content inserted into the cells.

Table created using the table tool in Canvas' rich text editor

Once you have completed creating your table, navigate to the Accessibility scanner icon, shown in the following image.

Location of Accessibility scanner in Canvas

Once you have activated the Accessibility checker, a popup will visually appear on the right. For faculty using a screen reader, your keyboard focus will automatically be moved into the checker so that you can quickly complete the items.

Note: This example uses a blank Canvas page. If there is additional content on your page, the table issues may not appear first in the sequence of found issues.

The first suggestion the Accessibility Checker will point out is adding a table caption. A table caption should be used to quickly and concisely describe the content of a table.

Accessibility checker results, prompting to add a table caption

The second suggestion that the Accessibility Checker will find is the lack of table headers. A table header can be used to identify rows and/or columns that describe the content in that table.

Accessibility checker, prompting to add table headers

Once you press the “Apply” button, the Accessibility Checker will be dismissed and you will see the styles applied to the table that you created.

Final result with added table caption and table headers

Lists in Canvas

It is important to use list elements in Canvas courses where appropriate. Lists help users of assistive technology by allowing for users to interact with the list before reading through it, but also gives a quick visual reference to sighted users who are browsing course content. For users of assistive technology, the size of the list is immediately announced to the user so they understand how many items they will need to read through.

There are two main types of lists. Unordered lists, or ul in HTML, should be used when giving a list of related items where order is not semantically important. An example of a good use of an unordered list is a listing of useful resources. Ordered lists, or ol in HTML, should be used when the sequence of the list has sequential importance. A good example of an ordered list could be a process that can be followed to produce a final result.

Using a list such as the following…
* coffee
* bagel
* cream cheese

Will be read out to a screen reader user as “asterisk coffee, asterisk bagel, asterisk cream cheese.”

Be sure to use the tools built in to Canvas to create lists.

Links in Canvas

Links are a common method used by users of assistive technology (AT) to quickly browse a page for the content they are looking for. This may be the first method that a user of assistive technology uses to find what they need on a page.

For example, a student using a screen reader may be looking for a specific PDF document on a page. It makes more sense for that user to have links on a page listed rather than reading through all of the page content to find that link.

Properly describing links is very important and easy to do. Using the tools within Canvas’ Rich Text Editor, creating accessible links takes only a matter of seconds.

Color Contrast in Canvas

One of the most common accessibility errors on the internet today are color contrast issues. Canvas defaults to accessible color schemes, but often when adding content from external sources we can inadvertently add in colors that do not meet the WCAG contrast guidelines.

Consider the following example…

Example of WCAG compliant color and non-compliant color next to one another

By using the correct contrast guidelines, we can assure that color blind individuals are able to understand that text is a hyperlink. Using proper color contrast also helps students who have perfect color vision, but may have sunglasses on or be working outside where the light pollution affects view of the screen.

Canvas’ accessibility checker also looks for contrast errors on Canvas pages. The tool will catch contrast errors and help you select compliant alternatives. Please note that the “Apply” button to add the color will not allow you to click it until a compliant color has been selected.

Color picker tool in Canvas